
Introduction
If you have killed a few herbs already, the chives plant is the one that will finally make you feel like a gardener. It shrugs off cold, bad soil, and forgotten watering days. Most people call it the easiest herb to grow, and they are right. You plant it once and it pays you back for years.
I planted one clump by my back door six springs ago and have not bought chives since. They are a cold-hardy perennial, tough down to USDA Zone 3, with slim green leaves that reach 10 to 20 inches (25 to 51 cm) tall. That hardiness is why the clump comes back on its own each spring. You do not replant, you do not fuss, and the plant keeps showing up like an old friend.
This guide goes past the basics. You get an honest pest and disease section. You get a clear look at the nutrition. And you get a pet-toxicity warning, because chives are toxic to cats, dogs, and horses. That last point matters if you share your home with animals.
Botanists know this plant as Allium schoenoprasum, a member of the onion family that earns its keep two ways. It is a kitchen staple with a mild onion bite, and an ornamental that feeds bees with purple summer blooms. That double duty is why it fits in vegetable beds, flower borders, and small pots on a sunny windowsill.
From here, you will learn what chives really are, how to plant and divide them, and how to keep them thriving. We will cover harvesting, the edible flowers and the pollinators they pull in, plus the pest and safety details you need. Think of this as the full life of growing chives, start to finish, this perennial herb included in every step.
What Is the Chives Plant
The chives plant is a small, grassy herb that grows in tidy clumps and comes back on its own each spring. Its real name is Allium schoenoprasum, and you will find it in the onion family next to garlic, leeks, and shallots. The full plant family is now Amaryllidaceae, but you can just treat your chives as a mild cousin of the onion.
This is a perennial herb, so it lives for years once it takes hold in your garden. It also comes back every season on its own, with no need to replant. Each clump you grow reaches about 10 to 20 inches (25 to 51 cm) tall and spreads close to 1 foot (30 cm) wide. Your chives shrug off cold winters too, since they stay hardy across USDA Zones 3 to 8.
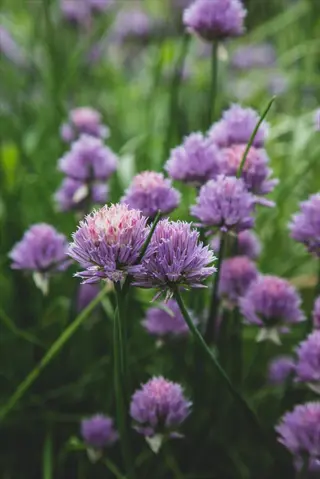
Two main types share the name, and telling them apart is easy. Onion chives have round, hollow leaves like thin green straws, and they push out soft lavender flowers in late spring. Garlic chives carry flat, solid leaves instead, and their white flowers bloom later, from July into August. The hollow tube versus the flat blade is your quickest way to know which one you have.
Bruise an onion chive leaf and you'll catch a gentle onion scent, much softer than a green onion or a shallot. The plant grows in loose, grassy tufts that look almost like a clump of fine lawn until the blooms appear. That mild flavor is why you'll want to add chives raw, scattered over eggs, potatoes, and soups.
People have leaned on this herb for a long time. Gardeners in Europe have grown chives since the Middle Ages, and farmers in China kept them for roughly 4,000 years. Today you'll see them earning their keep two ways, both as a kitchen staple and as a pretty edging plant along garden beds and paths.
Chives are toxic to cats, dogs, and horses. Keep growing plants and fresh trimmings out of reach of pets, since even small amounts of allium plants can harm them.
Planting and Propagation
Four springs ago I tucked one small division into the raised bed by my kitchen door. By its second summer it had bulked into a fist-sized clump that I snipped from almost every week. One plant fed the whole house, and I never needed a second.
You have two real paths when planting chives, and they are not equal. Growing chives from seed works, but it asks for patience. Starting chives from division is faster and far more reliable, so I reach for it first whenever a friend can spare a clump.
If you do start from seed, sow indoors a few weeks before your last frost. Drop each seed about 1/4 inch (6 mm) deep and keep the soil warm and damp. Germination crawls, so give it 4 to 6 weeks before you judge your trays. It feels slow because it is.
Division skips most of that wait. In spring, lift an established clump and pull it into smaller pieces. Make sure each new section holds at least 5 small bulbs so it regrows with real strength. Plan to propagate chives this way every 2 to 4 years, which keeps the parent plant young and gives you free starts.
Chive spacing depends on how you set the plants out. Sources put the range at 4 to 12 inches (10 to 30 cm) apart, so go tight in a small bed and wider where you have room. The steps below walk you through both methods from soil prep to that first deep watering.
Start chives from seed indoors before the last frost, or lift and split an existing clump in spring for a much faster, more reliable start.
Loosen well-drained soil rich in organic matter and aim for a pH of 6.0 to 7.0 so the shallow roots establish quickly.
Sow seed about 1/4 inch (6 mm) deep, or set divisions and transplants 4 to 12 inches (10 to 30 cm) apart depending on how much room you have.
When splitting a mature plant, pull it into sections that each hold at least 5 small bulbs so every piece regrows strongly.
Water the new plants well to settle the soil, then let them establish before easing back to occasional watering.
Most households never need a big planting. Around 20 to 25 plants cover all your fresh and dried use, and one or two healthy clumps divided over the years get you there. Start small, split when the clumps crowd, and you will have more chives than you can cut.
Growing Conditions and Care
Good chive plant care comes down to a few simple choices you get right once. These plants ask for full sun, the kind of soil that drains well, and almost nothing in the way of fuss after that. Get the basics in place and your clump returns stronger each spring.
Start with light. Chives want 6 to 8 hours of direct sun a day. The NC State Extension backs that range, and so does the team at the University of Minnesota. They cope with light partial shade, so a spot that loses the late sun still works. You just get fuller leaves in a brighter spot.
Chive soil matters more than most beginners expect. Aim for well-drained soil that is rich in organic matter. Target a pH between 6.0 and 7.0, the range the University of Minnesota Extension calls best. The plants are easygoing about texture and grow fine in clay, loam, sand, and rocky ground. Soggy roots are the one thing they will not forgive.
Watering chives is about reading the weather, not a daily routine. Once a clump takes hold it shrugs off dry spells. Save your deep watering for true droughts, not the morning soak. The goal is steady moisture when rain stops, and never standing water at the roots.
Over-fertilizing can be harmful to chives. Like many herbs, slower growth that is more compact leads to stronger flavors and healthier plants.
That same lesson shapes fertilizing chives. The plants need very little feeding. Heavy feeding backfires too, since it pushes fast, watery growth in place of the compact leaves that carry real flavor. A light spring topdressing of compost is plenty for most beds.
All of this adds up to one of the most low-maintenance perennials in the herb garden. Deer and rabbits leave chives alone, the plants tolerate rough soil, and they come back on their own year after year. Sort out the sun, the chive soil, and your watering habits, and the plant does the rest.
Harvesting and Storage
Knowing when to harvest chives is simple once your clump is established. Take your first cutting about 60 days after seeding or 30 days after transplanting. Wait until the leaves stand at least 6 inches (15 cm) long. At that height the plant has enough leaf to bounce back fast.
How to harvest chives matters more than most people think. Snip whole leaves down to within 1 to 2 inches (2.5 to 5 cm) of the soil instead of just trimming the tips. Cutting low this way triggers fresh chive regrowth straight from the base, so you get tender new blades rather than a clump of stubby, ragged ends. The plant stays tidy and keeps pushing out leaves all season.
I potted a clump of 'Grolau' chives in the south-facing windowsill by my kitchen sink. A handful goes into my scrambled eggs most winter mornings. I trimmed them right back to the base with kitchen scissors, and within a week the pot had filled in again with fresh green spears. The more often I cut, the more it hands me.
Once you cut more than you need in one go, you have to store chives the right way. Your fresh chives keep in the refrigerator for up to about one week before the flavor starts to fade. To hold onto them longer, freeze chives instead of drying them. Chopped and frozen, they keep most of their punch for cooking. Dried chives lose most of their flavor and end up a weak stand-in, so freezing beats drying every time.
One last tip for your kitchen. Heat wrecks the delicate onion taste of chives fast, so use them raw or stir them in at the very end of cooking. That is why they shine as a fresh garnish, snipped over your eggs, soups, and dips right before you serve.
When to Start Harvesting
- Timing: Begin harvesting about 60 days after seeding or roughly 30 days after transplanting, once leaves reach at least 6 inches (15 cm) long.
- Frequency: Cut regularly through the season, since frequent harvesting encourages tender new growth from the base of the clump.
- Best time of day: Harvest in the morning when the leaves are lush and full of flavor for the freshest results.
How to Cut Chives
- Technique: Snip whole leaves to within 1 to 2 inches (2.5 to 5 cm) of the soil rather than trimming only the tips.
- Why it works: Cutting low triggers fresh regrowth from the base, keeping the plant productive and tidy all season.
- Flower stalks: Cut spent flower stalks at the soil line so the plant puts its energy back into leaf production.
Refrigerating Fresh Chives
- Shelf life: Store freshly cut chives in the refrigerator for up to about one week before the flavor fades.
- Keeping them fresh: Wrap loosely or stand stems in a little water to slow wilting in the fridge.
- Use raw: Add chives raw or at the end of cooking, since heat quickly destroys their mild onion flavor.
Freezing and Drying
- Best method: Freezing keeps far more flavor than drying, so chop and freeze chives for cooking through winter.
- Drying drawback: Dried chives lose most of their flavor, making them a weak substitute for fresh or frozen.
- Portioning: Freeze chopped chives in small portions so you can pull out exactly what a recipe needs.
Flowers and Companion Plants
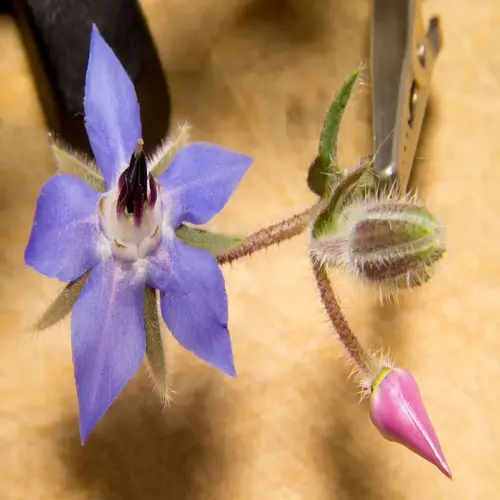
Your chive plant does more than flavor a baked potato. The round flower heads hold 10 to 30 star-shaped florets each, and bees work them through late spring and early summer. Chives carry a high nectar volume, which makes them strong chives for pollinators in any bed.
The bloom you get depends on the type you grow. Onion chives push out purple to lavender pompom flowers in late spring, while garlic chives bloom white in July and August. Both sets of chive flowers are edible, so you can scatter them over your plate or steep them in vinegar.
Those same blooms make companion planting with chives worth your small effort. The onion scent helps keep aphids, Japanese beetles, and carrot flies away. So you can tuck chives next to roses, carrots, and tomatoes for free pest cover. Keep them away from beans and peas though, since alliums can slow legume growth.
Edible Chive Blossoms
- Appearance: Round purple to lavender flower heads appear in late spring, each holding 10 to 30 small star-shaped florets.
- Flavor: The blossoms carry a mild onion flavor and make a colorful, edible garnish for salads and dips.
- Common use: Steep blossoms in vinegar for a pink, onion-scented chive blossom vinegar that competitors highlight often.
- Timing: Onion chives bloom in late spring, while garlic chives produce white flowers in July and August.
- Self-seeding: Remove spent flowers before they fade to stop chives from self-seeding across the bed.
- Bonus: Leaving a few flowers feeds pollinators, so balance tidiness with the plant's ecological value.
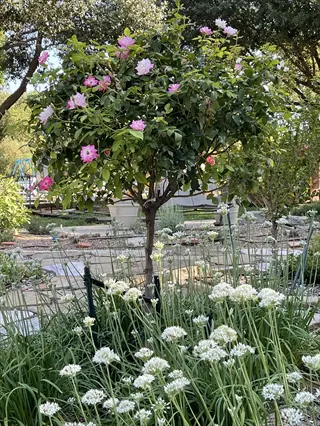
Chives Near Roses
- Benefit: The onion scent of chives helps repel aphids that commonly attack rose foliage and buds.
- Placement: Tuck a clump at the base of rose bushes where it doubles as a tidy, grassy edging.
- Bloom pairing: Purple chive flowers complement rose blooms while drawing pollinators to the planting.
- Care match: Both roses and chives enjoy full sun and well-drained soil, so their needs line up neatly.
- Low effort: Chives need little attention once planted, adding pest protection without extra work.
- Tradition: Pairing chives with roses is a long-standing companion-planting practice among gardeners.
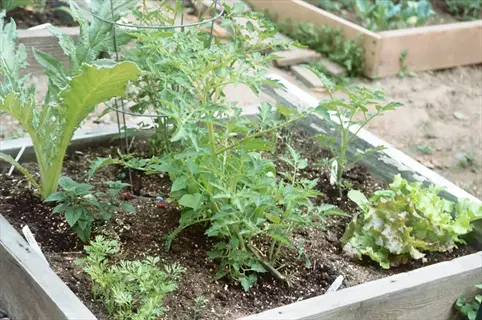
Chives With Carrots
- Benefit: The strong scent of chives helps confuse and deter carrot flies that target carrot roots.
- Placement: Plant chives along the edge of a carrot row so the scent drifts across the bed.
- Space saving: As a compact clump, chives fit easily between rows without crowding the carrots.
- Harvest overlap: You can snip chives all season while the carrots mature below the soil.
- Pest interrupter: Alliums like chives act as natural pest interrupters among vegetables.
- Avoid: Keep chives away from beans and peas, since alliums can slow the growth of legumes.

Chives Among Tomatoes
- Benefit: The onion scent of chives helps deter several pests that trouble tomato plants in summer.
- Placement: Set chive clumps near the base of tomato plants where they fit into small gaps.
- Pollinator draw: Chive flowers pull bees into the patch, supporting tomato pollination nearby.
- Care match: Tomatoes and chives both want full sun and steady but not soggy soil.
- Edging use: A line of chives makes a tidy, useful border along a tomato bed.
- Year-round value: Harvest chives all season as the tomatoes ripen for a steady kitchen supply.
The flowers are attractive to pollinators and are frequently visited by bumblebees and other types of bees.
One catch comes with all this beauty. Chives self-seed fast, so a few faded heads can spread seedlings across the bed by next spring. Snip the spent chive blossoms before they dry out, and the plant pours that energy back into fresh leaves instead.
So treat the flowers as a working part of the plant, not just a bonus. The edible flowers feed your kitchen and the bees, while a quick trim keeps the clump tidy and in its lane. You get pest help, color, and pollinators from one small herb.
Pests, Diseases, and Safety
Here is the good news first. Your chives plant has no serious problems and shrugs off most trouble that hits other herbs. It resists deer, handles drought, and fights off most disease on its own, so you will see issues rarely and fix them with ease.
When something does go wrong, the cause is almost always too much water rather than a bug. Most chive pests and chive diseases take hold when your roots sit in soggy ground and leaves stay wet. Good drainage and airflow stop the vast majority of them before they start.
Still, it helps to know what you are looking at. The list below covers the few troublemakers worth watching, from aphids on chives to soil fungi. You get a quick way to spot each one and a simple fix to match.
Aphids
- Identification: Tiny green or black insects cluster on leaves and stems, sucking sap and weakening the plant.
- Control: Rinse them off with water or apply insecticidal soap or neem oil if numbers build up.
- Prevention: Healthy, unstressed plants and nearby beneficial insects keep aphid numbers low naturally.
Thrips and Root Maggot
- Identification: Thrips cause silvery streaks on leaves, while root maggots tunnel into the bulbs below soil.
- Control: Remove badly affected plants and rotate where you grow alliums to break the pest cycle.
- Prevention: Good drainage and clean garden hygiene reduce the conditions these pests prefer.
Pink Root and Downy Mildew
- Identification: Pink root discolors roots pink and stunts growth, while downy mildew shows fuzzy growth in damp weather.
- Control: Improve airflow, avoid overhead watering, and remove infected plant material promptly.
- Prevention: Plant in well-drained soil with proper spacing so leaves dry quickly after rain or watering.
Leek Rust
- Identification: Look for bright orange pustules dotting the leaves, a sign noted by the Royal Horticultural Society.
- Control: Cut back and dispose of affected leaves, and avoid composting infected material.
- Prevention: Space plants for airflow and avoid wetting the foliage when watering to limit spread.
Soggy soil causes more chive problems than pests do. Plant in well-drained soil and avoid overwatering, since wet roots invite pink root and downy mildew.
Catch these early and you rarely lose a plant. Snip out the orange pustules of leek rust as soon as you spot them, pull any plant hit by pink root, and let the rest dry out between waterings. Your clump bounces back fast once conditions improve.
One safety note matters more than any pest. Chives are toxic to cats, dogs, and horses, so keep both your growing plants and cut trimmings out of reach. Sweep up snipped leaves after you harvest, and never leave them where a curious pet can chew on them.
5 Common Myths
Chives are an annual herb, so you have to buy new plants and replant them in the garden every single spring.
Chives are a hardy perennial. One healthy clump returns from its roots each spring and can produce for many years.
You should never cut a chive plant down hard, because removing most of the leaves will kill it for good.
Cutting chives to within 1 to 2 inches of the soil is the correct method. The plant regrows quickly after a hard trim.
Chives need rich, heavily fertilized soil and frequent feeding to produce the strongest possible flavor and growth.
Chives need little fertilizer. Over-feeding gives weak, watery flavor, while leaner soil produces more compact, stronger-tasting leaves.
Once chives flower, the leaves turn bitter and inedible, so the whole plant should be thrown out for the season.
Leaves stay edible after flowering, and the purple blossoms are edible too. Removing spent flowers simply keeps the plant tidy.
Chives are completely safe for every animal in the home since they are just a mild, harmless kitchen herb.
Chives are toxic to cats, dogs, and horses. Keep plants and fresh trimmings away from pets to avoid accidental poisoning.
Conclusion
The chives plant asks for almost nothing and gives back for years. I planted one small clump by my back step and barely touched it after that. It is a forgiving perennial herb that shrugs off neglect, bounces back from a hard cut, and pushes up fresh green spears every spring. Plant one clump and you set yourself up for harvest after harvest with very little work on your end.
Keep the basic numbers in mind and you really cannot go wrong with growing chives. Give the plant full sun for 6 to 8 hours a day. Set it in well-drained soil at a pH of 6.0 to 7.0. Cut the leaves back to 1 to 2 inches (2.5 to 5 cm) above the soil when you harvest. Then lift and split each clump every 2 to 4 years to keep the plants young and full.
Few plants pull this much weight from one small spot in the garden. You get edible leaves and edible flowers. The lavender blooms feed bumblebees and other pollinators, and the clump helps keep some pests away from its neighbors. That is a lot of value for one low-effort plant. No wonder so many gardeners call it the easiest herb to grow.
Good chive care really comes down to starting one small clump and letting it settle in. A single division usually feeds a whole household. Best of all, it comes back on its own each spring without any fuss. From a windowsill pot to a sunny garden border, chives fit almost any space. So plant your first clump and let it reward you season after season.
Glossary
- Allium schoenoprasum
- The botanical name for common chives, a perennial herb in the onion family.
- Bulblet
- A small underground bulb; a chive division should include at least five of them to regrow well.
- Deadheading
- Removing spent flowers so the plant stops setting seed and puts energy into new growth.
- Division
- Splitting an established clump into smaller rooted pieces to make new plants.
- Leek rust
- A fungal disease showing as bright orange pustules on the leaves of chives and related plants.
- Perennial
- A plant that lives for several years, dying back in winter and regrowing from its roots each spring.
- Pink root
- A soil-borne fungal disease that turns chive roots pink and stunts the plant's growth.
- Self-seeding
- When a plant drops its own seed and grows new seedlings around itself without help.
External Sources
Frequently Asked Questions
Do chives come back every year?
Yes. Chives are a cold-hardy perennial that regrows from the same underground clump each spring.
Is chives garlic or onion?
Chives are in the onion family. The two main types are onion chives and garlic chives.
Do chives like sun or shade?
Chives prefer full sun for 6 to 8 hours daily but tolerate light partial shade.
Are chives invasive?
Chives are not invasive, but they self-seed and can spread if flowers are left to set seed.
Can I grow chives in winter?
Outdoor chives go dormant, but you can grow them indoors on a sunny windowsill year-round.
What should not be planted near chives?
Avoid planting chives near beans and peas, as alliums can slow legume growth.
What pests hate chives?
Chives help deter aphids, Japanese beetles, and carrot flies with their onion scent.
Should you water chives every day?
No. Established chives need only deep watering during dry spells, not every day.
Do coffee grounds help chives grow?
Used grounds add light organic matter, but chives need little feeding and dislike rich soil.
Why is it so hard to grow chives from seed?
Chive seed germinates slowly over 4 to 6 weeks, so dividing existing clumps is far easier.