
Introduction
Your monstera has grown long and leggy, with bare stem stretching toward the window. That tall vine is not a problem. It's free plants waiting to happen. All you need is a clean cut and a glass of water. This is the magic of monstera propagation, where you take one big plant and make many. Soon you can fill a shelf or hand one to a friend.
Here is the one rule that decides everything. To propagate monstera, your cutting must include a node. A node is the small bump on the stem where leaves and roots grow. University of Minnesota Extension says a cutting without a node, like a lone leaf, will not grow. It rots instead. Get this part right and the rest is patience.
A glass of water on the windowsill is where many guides end. This one keeps going. You'll get real timelines for roots and new leaves. You'll get a troubleshooting fix for when a cutting fails. And you'll see why some monstera cuttings turn to mush. We also weigh water, perlite, and soil side by side.
Propagation comes down to three choices. Where you cut, what you root the cutting in, and how long you wait. The sections ahead walk through each one in plain steps. Monstera is one of the easiest houseplants to start with, so you don't need fancy gear or a green thumb to pull this off.
How to Propagate Monstera
I'm at the east-facing window with my three-year-old monstera, a leggy vine that has outgrown its corner. My blade slides along the green stem and stops below a small white nub, the node, swollen and easy to spot once you know the look. The cut comes off clean in my hand, and that little bump is the whole reason this piece will become a new plant.
That single bump is what makes how to propagate monstera so simple once you get it. A node is the spot where a leaf and an aerial root push out from the stem. Cut a piece without one and you get a leaf that rots in the cup. Cut a piece with one and you get a brand new plant in a few weeks.
Before any blade touches the plant, wipe it down with rubbing alcohol. A clean cut on a clean stem heals fast, while a dirty blade pushes rot straight into the fresh wound. This one habit saves more cuttings than any fancy rooting trick you'll read about online.
Here's the part hobbyists love. One long vine holds several nodes, so you can chop it into single-node cuttings and grow a whole shelf of plants from one stem cutting. And don't worry about the parent. The mother plant pushes fresh growth right out of the spot where you cut, so you lose nothing by trimming her back.
Choose a stem with at least one node, the small bump where a leaf and aerial root meet. The node is where new roots form.
Using a blade wiped with rubbing alcohol, cut 1 to 2 inches (2.5 to 5 cm) below the node along the internode so the node stays intact.
Place the node in clean water or press it into a moist rooting medium. Keep it in bright, indirect light while roots develop.
Roots usually appear in about 2 to 4 weeks. Change cloudy water and keep solid media lightly moist while you wait.
Once roots are an inch or two long, move the cutting into a snug pot with well-draining soil and water it in gently.
Work through those five steps and your rooting odds climb fast. The node does the heavy lifting, bright light keeps the cutting fed, and a clean cut keeps rot away. Give it 2 to 4 weeks and you'll see those first white roots reach for the water.
Find the Node First
A single leaf floating in a jar will sit there for weeks and then turn to mush. The piece that grows roots and a whole new plant is the monstera node, not the leaf. Plenty of guides tell you to include a node and then never show you what one looks like.
Think of the node as the plant's growth button. It holds a hidden axillary bud, the tiny dormant point that fires off new roots and new shoots. A leaf is just a solar panel. It feeds the plant, but on its own it can never start a new one.
Plant scientists are blunt about this. A cutting with no node and no axillary bud, such as a bare leaf, will not grow. It just rots in the jar. So before you make a single cut, find the node and keep it whole.
Finding it is easier than it sounds. Look for a slightly raised band that wraps around the stem, the spot where a leaf, a petiole, and an aerial root all push out together. That meeting point is your node. The smooth stretch of stem between two nodes is the internode, and that is where you will eventually cut.
The Node
- What it is: A slightly raised band on the stem holding the hidden axillary bud, the only spot that can grow new roots and shoots.
- Why it matters: Without a node, a cutting cannot grow. University of Minnesota Extension confirms leaves alone will simply rot over time.
- How to spot it: Look where a leaf, petiole, and aerial root all meet the main stem; that meeting point is the node.
The Internode
- What it is: The smooth length of stem between two nodes, with no leaves or buds along its surface.
- Why it matters: You cut here, about 1 to 2 inches (2.5 to 5 cm) below the node, so the node stays whole on the cutting.
- Good to know: A clean internode cut leaves enough stem to anchor the cutting in water or medium without crowding the node.
Aerial Roots
- What they are: Thick roots that grow from near the node along the stem, helping the plant climb and grab moisture in the wild.
- Why they help: A cutting that includes an aerial root often settles in faster, though the node, not the aerial root, is what truly matters.
- Good to know: You can pot aerial roots or trim them; they will not harm the cutting either way during rooting.
The Petiole and Leaf
- What they are: The petiole is the stalk that holds the leaf, and the leaf is the broad blade that gathers light.
- Why they matter: Leaves fuel rooting through photosynthesis, but a petiole or leaf with no node will never form a new plant.
- Good to know: Keep at least one healthy leaf on your cutting to power root growth, but never rely on a leaf alone.
An aerial root near the node gives your cutting a head start, since it can soak up water right away. But it is a bonus, not a rule. The node is the only part that truly has to come along for the ride, and once you can spot one, the rest of propagation gets a lot less scary.
Monstera deliciosa can only be propagated when the cutting includes a node.
Compare Propagation Methods
You have more than one way to grow a new monstera, and the method you pick should match your patience and your setup. Most people grab a jar of water and call it done. That works, but it is not always the smartest choice for the plant you have in front of you.
Water propagation wins for beginners because you watch every root form through the glass. Stem cuttings sit in a vase, and you swap the water when it turns cloudy. The downside is real though. Roots grown in water are weaker than roots grown in solid media, so they sometimes struggle when you move them to a pot.
Soil propagation and perlite skip that weak-root problem by rooting the cutting in the medium it will live in. Perlite is the most common choice, and you keep it lightly moist while roots take hold. For a big or rare plant, air layering is the lowest-risk path of all. You root the stem while it stays attached to the mother plant, so you only cut once the new roots already exist. Division is the fast option for a mature, clumping plant, since you split rooted sections apart and each piece comes with its own roots.
Most cuttings root in 2 to 4 weeks, as the table notes. Warmth and light shift that window either way. If you are new to this, start with water so you can spot trouble early. Once you trust your timing, perlite and soil propagation give you stronger roots and a smoother move into the pot.
Choose a Rooting Medium
The white roots from my windowsill jar looked perfect until I potted the cutting, and within a week they turned thin, mushy, and limp. The same plant settled in far better the next round, when I rooted a fresh node in perlite instead and the roots came out sturdy and pale. That gap in strength comes straight from the rooting medium you pick, not from the cutting itself.
You have four solid choices here, not just the jar of water. The team at University of Minnesota Extension backs each one. Your options are water, perlite, LECA, and a well-draining soil or damp sphagnum moss mix. Water roots are the weakest of the group, so think past the jar if you want a cutting that shrugs off the move into a pot.
Water
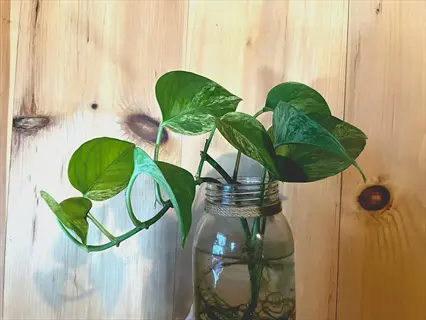
- How it works: Suspend the node in clean water so roots grow where you can see them, which makes it the easiest medium to monitor.
- Upside: It is free, beginner-friendly, and lets you confirm rooting before you ever pot the cutting up.
- Downside: University of Minnesota Extension notes water roots are weaker than roots grown in solid media and can struggle after transplant.
- Care tip: Change the water whenever it turns cloudy rather than on a fixed schedule, keeping oxygen and cleanliness high.
- Container: Use a clear jar so light reaches you, not the roots, and you can watch progress without disturbing them.
- Best for: First-time propagators who want a low-cost, visual way to learn the process.
Perlite
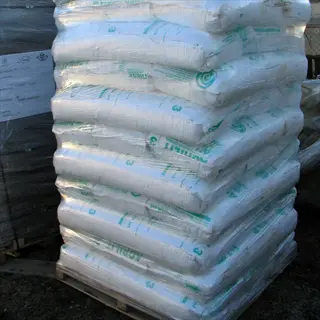
- How it works: White volcanic granules hold moisture and air around the node, giving roots a sturdy, well-drained space to form.
- Upside: University of Minnesota Extension calls perlite the most common rooting medium because it drains freely and resists rot.
- Downside: It dries out faster than soil, so you need to keep it lightly and evenly moist while roots develop.
- Care tip: Moisten the perlite first, then nestle the node just below the surface so it stays in contact with damp granules.
- Result: Roots grown in perlite tend to be sturdier and transplant into soil more smoothly than water roots.
- Best for: Propagators who want stronger roots without the mess of a full soil mix.
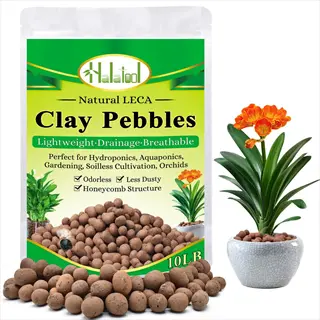
LECA and Semi-Hydro
- How it works: Lightweight clay balls wick moisture up to the node while leaving plenty of air pockets around the roots.
- Upside: University of Minnesota Extension lists LECA as a valid medium, and it is popular for clean, reusable semi-hydro setups.
- Downside: It needs a reservoir and occasional rinsing, so it takes a little more setup than a simple jar of water.
- Care tip: Keep a shallow water level at the base so the clay stays damp without drowning the node.
- Result: Roots adapted to LECA often move into other semi-hydro systems easily once they are established.
- Best for: Hobbyists who like tidy, low-mess systems and want to reuse their medium.
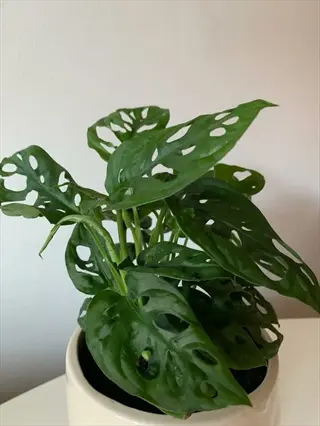
Potting Soil and Sphagnum
- How it works: A loose, well-draining mix or damp sphagnum moss surrounds the node and roots it directly where it will keep growing.
- Upside: Roots form straight into their final medium, so there is no shock from moving water roots into soil later.
- Downside: You cannot see roots forming, so you must resist tugging the cutting to check on its progress.
- Care tip: Keep the mix moist but never soggy, since standing wetness around the node invites rot.
- Mix idea: A blend with orchid bark or perlite added keeps the soil airy and draining well for new roots.
- Best for: Propagators who prefer to skip the water stage and root once, directly in soil.
One rule holds no matter which medium you choose. The node must stay submerged or buried the whole time, because that is the only spot where new roots will break out. A node left high and dry just sits there and rots, even in the best mix you can buy.
New to this? Start in water so you can watch the roots form. Once you trust the process, move up to perlite or LECA. Both drain well and fight off rot. They give you a tougher root system that handles the move into soil far better than a jar ever will.
Rooting Timelines and Timing
Here is the part that trips people up the most. The rooting time is quick, but the wait for a new leaf is slow. Knowing the gap between those two stages keeps you from giving up on a cutting that is doing fine.
University of Minnesota Extension puts root growth at about 2 to 4 weeks. Those first weeks look dead quiet above the surface. So trust the timeline and leave the cutting alone while the node does its work.
New leaves take much longer. Expect 2 to 3 months before a fresh leaf unfurls from the node, and that long pause is normal. Your plant is busy building roots first, and it will not spend energy on new leaves until that base is solid.
Day 1
Take the cutting with an intact node and set it in water or moist medium in bright, indirect light.
Weeks 1 to 2
Little visible change above the surface. Keep water clean and medium lightly moist while roots begin forming.
Weeks 2 to 4
Roots emerge from the node. Once they reach an inch or two, the cutting is ready to pot up.
Months 2 to 3
A new leaf finally unfurls from the node, the sign your propagated plant is truly growing.
Late Fall and Winter
Cuttings still root any time of year, but give them about 2 to 3 hours of extra light per day.
So what is the best time to propagate? The honest answer is any time of year. Spring and summer fall inside the active growing season, so cuttings root a bit faster then, but you are not locked out in October.
Take a cutting in late fall or winter and it still roots well. You just need to add about 2 to 3 hours of supplemental light each day. That makes up for the short, dim days, as Wisconsin Horticulture notes. A bit of warmth helps too, so keep the cutting away from cold drafty windows.
Resist tugging a cutting to check for roots in the first weeks. Disturbing the node slows rooting and can damage fragile new growth.
Fix Failed Cuttings
I pulled a cutting out of the windowsill jar and the stem slid through my fingers, black and slick like a wet noodle. The smell hit me next. I cut it back hard, past every soft spot, until the stem ran pale green and firm. Then I rinsed it under the tap and dropped it into a clean jar of fresh water. Two weeks later it pushed out white roots. The water in that old jar had gone cloudy and grey, and I had left it sitting untouched the whole time.
The good news about why cuttings fail is simple: almost every problem is fixable if you catch it early and the node is still firm. A cutting can look rough, drop a leaf, or sit there for weeks doing nothing and still come back strong. The node holds all the potential, so as long as it stays solid you have something to work with.
Most failures trace back to overwatering or stale water that starves the node of oxygen. A stressed monstera tells you what is wrong through clear signs, from yellowing leaves to a stem that turns soft and dark. Read those signals fast and you can step in before things tip into full root rot.
Cutting Has No Roots After Weeks
- Likely cause: The cutting may lack a node, or it sits in cold, dim conditions that slow root formation to a crawl.
- The fix: Confirm a firm node is present, then move the cutting somewhere warm with bright, indirect light and wait a little longer.
- Prevent it: Always include a clear node and give late-season cuttings about 2 to 3 hours of extra light per day.
Stem Turns Soft, Black, or Slimy
- Likely cause: Stagnant, cloudy water or a soggy medium starves the node of oxygen and lets rot take hold quickly.
- The fix: Trim back to firm, healthy tissue, rinse the cutting, and restart it in fresh clean water or lightly moist medium.
- Prevent it: Change water as soon as it turns cloudy and never let solid media stay waterlogged around the node.
Roots Look Brown and Mushy
- Likely cause: This is classic root rot from overwatering or a constantly wet medium, which University of Minnesota Extension links to soft, browning roots.
- The fix: Snip off every soft brown root back to white firm tissue, then re-root the cutting in clean water or fresh airy medium.
- Prevent it: Use a free-draining medium and let the surface dry slightly between waterings once the cutting is potted.
Leaves Yellow or Droop
- Likely cause: Yellowing and drooping are common stress signs from rooting strain, too much direct sun, or a medium that stays too wet.
- The fix: Move the cutting out of harsh sun, ease off watering, and let it focus its energy on building roots before pushing leaves.
- Prevent it: Keep cuttings in steady bright, indirect light and avoid both bone-dry and waterlogged conditions while they root.
5 Common Myths
You can grow a brand new monstera from a single leaf placed in water, the same way you root some other houseplants.
A leaf without a node has no growth point. It may stay green for weeks but will never form a new plant and eventually rots.
Monstera cuttings can only be taken during spring and summer, so trying in fall or winter is a waste of time.
University extension sources confirm cuttings can be taken any time of year. Late fall and winter cuttings just need about 2 to 3 hours of extra light daily.
A monstera rooted in plain water will always be just as strong as one rooted in soil or perlite.
Water roots tend to be weaker than roots grown in solid media. Cuttings often adapt better when started in perlite, soil, or LECA.
Bigger pots are better for a fresh cutting because they give the new roots plenty of room to spread out.
Oversized pots hold extra water that the small root system cannot use, which keeps soil soggy and raises the risk of rot.
Adding coffee grounds to a propagating monstera feeds it and speeds up how fast the cutting forms roots.
There is no reliable evidence that coffee grounds help monstera propagation. A node, clean water or medium, and good light matter far more.
Conclusion
Every method in this guide comes back to one rule. Each cutting needs a node, that bumpy spot on the stem where leaves and aerial roots grow. Get that part right and the rest of monstera propagation falls into place. Skip it and you end up with a leaf that rots in the jar instead of a new plant.
The numbers from the University of Minnesota Extension keep things honest while you wait. Roots tend to show up in about 2 to 4 weeks, and new leaves take 2 to 3 months to push out. You can take monstera cuttings any time of year, so there is no perfect season to wait for. A winter cutting just wants a couple of extra hours of light each day.
Pick one method and start there. I dropped my first cutting into an old jam jar on a warm windowsill, and watching the rooting happen through the glass is what hooked me. Keep the node clean, change the water when it turns cloudy, and give it bright indirect light. Once you feel sure of yourself, branch out into perlite or LECA for stronger roots. Then let patience do the rest of the work.
One healthy cutting can fill a whole windowsill over time. The plant you propagate this month can give you a dozen more down the road, each one free. So take a clean cut below a good node, set it somewhere warm and bright, and trust the process. You have everything you need to propagate monstera with confidence now.
Glossary
- Aerial root
- A thick root that grows from the stem near a node, helping the plant climb and absorb moisture.
- Axillary bud
- The hidden growth point inside a node that lets a cutting sprout new roots and leaves.
- Internode
- The smooth stretch of stem between two nodes, where you make the cut on a cutting.
- LECA
- Lightweight expanded clay balls used in semi-hydro setups to wick moisture to roots while keeping air around them.
- Node
- The slightly raised band on a monstera stem holding the bud where new roots and shoots can form.
- Perlite
- Lightweight white volcanic granules used as a rooting medium because they drain freely and resist rot.
- Petiole
- The stalk that connects a leaf to the main stem of the plant.
- Sphagnum moss
- A soft, water-holding moss often packed around a node to root cuttings.
External Sources
Frequently Asked Questions
How do you propagate monstera?
Cut a stem section that includes at least one node, place it in water or a moist rooting medium, and wait 2 to 4 weeks for roots.
Is it better to propagate monstera in water or soil?
Water lets you watch roots form and is great for beginners, while soil and perlite grow sturdier roots that adapt faster after potting.
How long does it take a monstera cutting to root?
Roots usually form in about 2 to 4 weeks, and new leaves can take another 2 to 3 months to appear.
Can I cut a monstera leaf off and replant it?
No. A leaf without a node cannot grow into a new plant. It may live a while in water but will eventually rot.
What are the most common monstera propagation mistakes?
Common mistakes include cutting without a node, leaving water cloudy and stagnant, keeping the medium soggy, and using a dull or dirty blade.
Is October too late to take monstera cuttings?
No. You can take cuttings any time of year. Late fall and winter cuttings simply need about 2 to 3 hours of extra light per day.
Can I move my monstera from soil to water?
Yes. Rinse the soil off the roots gently, then place the plant in clean water and change it when it turns cloudy.
Do monsteras like small or big pots?
A young cutting needs a snug pot at least 4 inches (10 cm) wide and 5 inches (13 cm) deep. Oversized pots hold too much water and invite rot.
Why can't you eat monstera fruit?
Unripe monstera fruit is full of calcium oxalate crystals that irritate the mouth and throat. Only fully ripe fruit, with scales that fall off, is safe.
What does a stressed monstera look like?
A stressed monstera often shows yellowing leaves, drooping or curling foliage, brown crispy edges, and soft or browning roots.