Vegetable · Aizoaceae
New Zealand Spinach
Tetragonia tetragonioides
Grow this heat-loving summer green and you'll be picking tender leaves long after true spinach has bolted.
Full sun
Every 4–7 days
50–86°F · 10–30°C
50–70 days
Overview
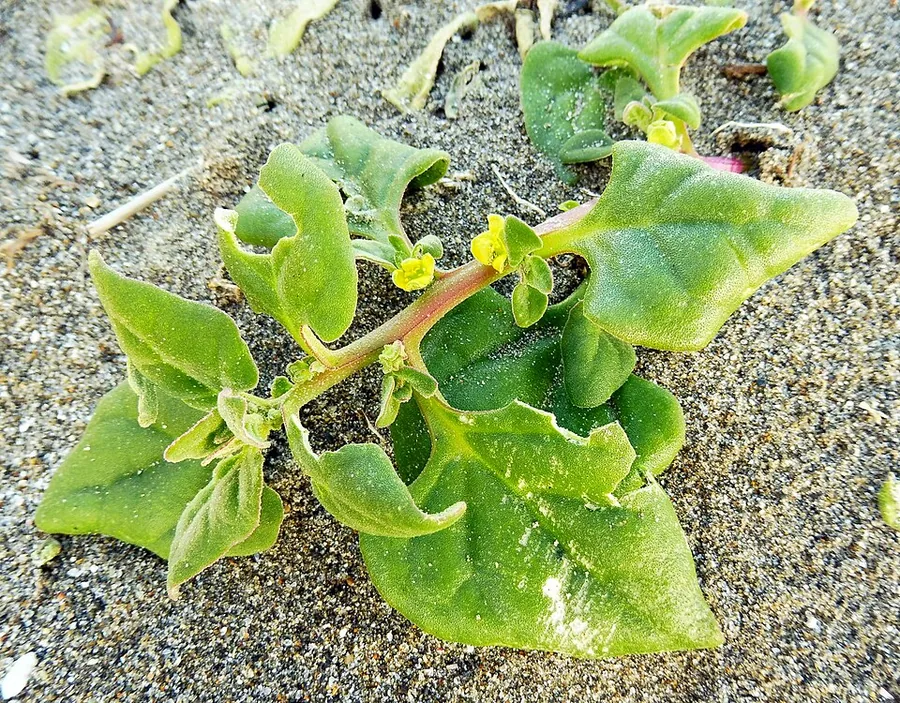
Ever notice how true spinach gives up the moment summer turns hot? That's exactly when New Zealand spinach is just getting going. It isn't a spinach at all, really, but a sprawling member of the fig-marigold family from coastal New Zealand and Australia, where it grows wild on dunes and shingle. Cook up the thick, soft leaves and they taste a lot like the spinach you already know.
This one likes to spread low and wide, trailing across the ground into a dense mat a few feet across instead of standing up tall. It's happy where things get hot and dry, and it'll even take salty and alkaline soil that would stop most greens cold. Keep pinching the tender growing tips through the season and it just keeps answering back with fresh shoots, so the kitchen stays stocked right up to the first fall frost.
Here's the one thing to keep in mind before you dig in: the raw leaves hold oxalates and saponins, so this is a green you cook rather than heap into a salad. A quick blanch in boiling water and a pour-off of that water makes it good eating, and honestly? That little bit of prep buys you a crop that keeps giving when nothing else will.
Care
The short version: full sun and warm soil, plus steady water through summer, get you the best leaves. Feed it monthly with a nitrogen-rich fertilizer, give it plenty of room to sprawl, and keep picking the tips so new growth keeps coming.
Light
Give it full sun for the heaviest, tastiest leaves, though it'll take partial shade and keep right on producing. The more light it gets, the more tips you'll have to pick, so it's a pretty easy call.
Water
Once it's settled in, it shrugs off heat and drought no problem, but the leaves taste best and stay tender with steady, even moisture through summer. Water every 4 to 7 days, and lean toward the shorter end during a heat wave or in sandy ground.
Soil
Plant it in well-drained sandy loam with plenty of organic matter worked in. A pH of 6.5 to 7.5 suits it, and unlike most greens it doesn't mind alkaline or even salty soil near the coast.
Temperature
It's a heat lover, comfy anywhere from about 50°F to 86°F (10°C to 30°C) and happiest in the thick of high summer. Frost, though, is a dealbreaker, so wait for warm soil before planting out.
Humidity
Ordinary outdoor air is all it wants, somewhere around 40% to 70%, and it really isn't fussy either way. So there's no number here to chase.
Feeding
Keep it fed for steady, leafy growth, because a hungry plant pales and bolts early. Give it a nitrogen-rich fertilizer monthly through the season, roughly 1/4 cup of N per 10 feet of row, which also helps hold off early flowering.
Pruning
Here's the neat part, pruning and harvesting are the exact same job. Cut or pinch the top 4 inches of the growing tips often, and the plant pushes out tender new shoots and stays productive instead of running to seed.
Size & spacing
Plants only stand about 12 to 24 inches (30 to 60 cm) tall, but they sprawl into a mat 3 to 4 feet (90 to 120 cm) across. Set them roughly a foot apart within the row and leave about 3 feet between rows so those trailing stems have somewhere to run.
When to plant
New Zealand spinach is a warm-season crop, and it just won't take frost. Start transplants indoors a few weeks ahead, set them out once the cold's behind you and the soil's warmed up, then keep harvesting young leaves and tips right through the summer heat until the first fall frost.
Northern hemisphere
Southern hemisphere
Typical months for a temperate climate: start earlier in warm zones, later where spring frosts linger.
- Sow: Start transplants indoors 3-4 weeks before the last spring frost
- Plant: After the last frost when soil is warm; soak the hard seed in water ~24 hours before sowing and plant about 1 in deep
- Harvest: Harvest young leaves and growing tips continually through summer heat until the first fall frost
Hardiness
USDA hardiness zones: 9–11
Temperature: down to -7°C
Troubleshooting
This is a tough, easygoing plant, and honestly most of what goes wrong is either cosmetic or just a case of the plant being hungry. Learn the few signs below and you'll quickly tell the real problems from the ones it'll simply outgrow.
Washed-out, yellowish leaves that bounce back slowly
Washed-out leaves and slow regrowth after cutting? That's usually the plant asking for more nitrogen, and a hungry one tends to bolt and flower early too. So side-dress with a nitrogen fertilizer, roughly 1/4 cup of N per 10 feet of row each month, and keep the soil evenly moist in between. Stick with that monthly feed and the leaves stay a nice deep green while the harvest keeps rolling in.
Fix:
- Side-dress with a nitrogen fertilizer
- Apply about 1/4 cup N per 10 ft of row monthly
- Keep soil evenly moist between feedings
Little round holes showing up all over the leaves
See little punched holes in the young leaves? That's usually chewing beetles at work, most likely flea beetles that hop up onto the tender foliage. It looks worse than it really is, and a strong, well-fed plant just grows right past the nibbling. Pop a floating row cover over the seedlings early on, and only bother hand-picking or treating if the holes start getting the better of the new growth.
Fix:
- Tolerate minor cosmetic damage; vigorous plants outgrow it
- Use floating row cover over young plants
- Hand-pick or treat only if damage becomes heavy
Stems sprawl and flop across the ground
Don't worry, that flopping is just the plant being itself. It's got a naturally trailing, weak-stemmed habit, so it lays down a low carpet 2 to 3 feet wide instead of standing up straight, and crowding only makes the sprawl worse. Give each plant 12 inches within the row and 3 feet between rows, let the stems wander into open ground, and pinch the tips if you want bushier, fuller branching.
Fix:
- Allow 12 in within rows and 3 ft between rows
- Let stems trail into open ground or train through other vegetation
- Harvest tips to promote bushier branching
Toxicity
Good news, this is food, not poison, though there's one small thing to know. The leaves hold natural oxalates and saponins, which is why people cook them instead of eating them raw in quantity, and those same compounds make the raw greens a mild caution for pets and livestock. Cook the leaves for the table and keep big raw helpings away from the animals, and everybody's fine.
Toxic to
Cats · Dogs · Horses · Rabbits · Livestock · Birds
Safe for
People
Cats Mild
A quick nibble usually doesn't do much at all. But if a cat tucks into a big pile of the raw, oxalate-rich leaves, it might drool a bit or get a queasy stomach. It's not a listed ASPCA toxin, so there's no big scare here.
Dogs Mild
A dog that gulps down a big helping of raw leaves can wind up with a mild upset stomach, thanks to the oxalic acid and saponins. Little tastes here and there? Those tend to pass without any fuss.
Horses Mild
The soluble oxalates make the raw greens a bad idea in any real quantity for horses, since a steady diet high in oxalates can mess with how they take up calcium. An occasional mouthful, though, isn't likely to bother a healthy horse.
Rabbits Mild
Just keep the portions small. The oxalate load means the raw leaves shouldn't be a staple in a rabbit's diet, but a little bit mixed in with other greens is usually fine.
Livestock Mild
Grazing animals can handle a bit, but the oxalic acid really adds up if they keep munching large amounts day after day. So think of it as one part of a mixed diet rather than the main forage.
Birds Mild
Backyard hens and other birds will peck away at the foliage without much drama, though it's smart to go easy on the raw leaves because of those oxalates.
People Edible when cooked
For people, this is a proper kitchen green, and it's safe and tasty once it's cooked. Just blanch the leaves for 1 to 3 minutes and tip out the water to knock back the oxalates and saponins, and go easy on raw amounts if you're prone to kidney stones.
Blanch leaves in boiling water about 1-3 minutes and discard that water before eating to reduce oxalate and saponin levels; avoid eating large amounts raw, particularly for people prone to kidney stones.
Helpline numbers

United States
ASPCA Animal Poison Control: (888) 426-4435 (fee applies)
Poison Control: (800) 222-1222



Canada
Poison Centres: 1-844-764-7669
Varieties
There isn't a whole lot to pick from here, since New Zealand spinach almost always gets grown as the plain species. Still, a name or two does pop up in the seed catalogs.
Maori
You'll spot this named selection in extension references, even though pretty much all New Zealand spinach gets grown as the plain, unimproved species.
Common (species type)
This wild-type species is what most gardeners end up growing, mainly because there just aren't many named cultivars of the plant around.
How to propagate
Starting New Zealand spinach is pretty simple, and seed is how it's done. The one trick worth knowing? How to coax that hard seed into sprouting on time.
SeedEasy
After the last frost when soil is warm, or start indoors 3-4 weeks before the last frost · About 1-3 weeks to germinate (faster if seed is pre-soaked); roughly 50-70 days to first harvest
It's grown from seed, and the one handy trick is giving that hard, knobby fruit a soak in water for about 24 hours before you sow it. Pop it in roughly an inch deep and thin the seedlings to a foot apart. You'll see germination in 1 to 3 weeks, faster if you pre-soaked, and your first harvest of leaves and tips in about 50 to 70 days.
Myths
Since it's called spinach, it must be the real thing.
The name's a bit of a tease, because the plant actually belongs to the fig-marigold family (Aizoaceae) and isn't related to true spinach at all. It's really just a heat-tolerant summer stand-in that keeps cropping long after the real stuff has bolted and quit.
It's fine to toss big handfuls of raw leaves into a salad.
Since the leaves carry oxalates and saponins, they aren't really a salad-bowl green you can pile on. Blanch them for 1 to 3 minutes and pour off the water before eating, and keep the raw portions on the small side.
A touch of frost won't bother it, same as normal spinach.
Nope, this one's a tender warm-season crop, and a frost will kill it outright. So hold off, and only sow or transplant once the last frost has passed and the soil's warmed up.